BlackDrag0n
Administrator
[Lab] CLI Deployment of the vCenter Server Appliance
Ở bài lab này mình sẽ thực hiện việc cài đặt vCenter bằng CLI. Như mọi người thường hay dùng UI để có thể setup vCenter một cách đễ dàng, các bước cài đặt vCenter mọi người có thể tham khảo bài viết.
Việc cài đặt vCenter bằng CLI sẽ dựa trên file JSON được định nghĩa sẵn các thông tin, thông số của vCenter mà bạn muốn cài đặt. Đối với các bộ cài đặt VCSA sẽ bao gồm sẵn các template, các bạn có thể tham khảo và thay đổi các thông số trong file Templates đó để sử dụng. Đường dẫn mặc định của Template là vcsa-cli-installer\templates.

Trong đó sẽ có 3 folder gồm:
- Install: Installation of vCenter Server Appliance (VCSA) 7.0
- Upgrade: Upgrade of vCenter Server Appliance (VCSA) 6.5 and 6.7 to 7.0.
- Migration: Migration of Windows vCenter Server installations 6.5 and 6.7 to VCSA 7.0.
Vì mình cần cài đặt nên mình sẽ sử dụng Template Install

Vào thư mục Install, các bạn sẽ thấy có sẵn 5 file Template dành cho 5 mục địch
- embedded_VCSA_on_*.json: Platform Services Controller (PSC) and VCSA together on one system
- VCSA_on_*.json: Only a VCSA
- *_on_ESXi.json: Install onto the ESXi host specified in the JSON file
- *_on_VC.json: Install onto a host managed by the vCenter instance specified in the JSON file
Ở đây mình đã có sẵn vCenter và muốn deploy thêm vCenter lên hệ thống lab có sẵn nên mình sẽ chọn file embedded_VCSA_on_VC.json để cài đặt. Nội dung File các bạn có thể tham khảo:
JSON:
{
    "__version": "2.13.0",
    "__comments": "Sample template to deploy a vCenter Server Appliance with an embedded Platform Services Controller on a vCenter Server instance.",
    "new_vcsa": {
        "vc": {
            "__comments": [
                "'datacenter' must end with a datacenter name, and only with a datacenter name. ",
                "'target' must end with an ESXi hostname, a cluster name, or a resource pool name. ",
                "The item 'Resources' must precede the resource pool name. ",
                "All names are case-sensitive. ",
                "For details and examples, refer to template help, i.e. vcsa-deploy {install|upgrade|migrate} --template-help"
            ],
            "hostname": "<FQDN or IP address of the vCenter Server instance>",
            "username": "<The user name of a user with administrative privileges or the Single Sign-On administrator on vCenter.>",
            "password": "<The password of a user with administrative privileges or the Single Sign-On administrator on vCenter. If left blank, or omitted, you will be prompted to enter it at the command console during template verification.>",
            "deployment_network": "VM Network",
            "datacenter": [
                "Folder 1 (parent of Folder 2)",
                "Folder 2 (parent of Your Datacenter)",
                "Your Datacenter"
            ],
            "datastore": "<A specific datastore accessible to the ESXi host or DRS cluster in the 'target' path.>",
            "target": [
                "Folder A (parent of Folder B)",
                "Folder B (parent of Your ESXi Host, or Cluster)",
                "Your ESXi Host, or Cluster"
            ]
        },
        "appliance": {
            "__comments": [
                "You must provide the 'deployment_option' key with a value, which will affect the vCenter Server Appliance's configuration parameters, such as the vCenter Server Appliance's number of vCPUs, the memory size, the storage size, and the maximum numbers of ESXi hosts and VMs which can be managed. For a list of acceptable values, run the supported deployment sizes help, i.e. vcsa-deploy --supported-deployment-sizes"
            ],
            "thin_disk_mode": true,
            "deployment_option": "small",
            "name": "Embedded-vCenter-Server-Appliance"
        },
        "network": {
            "ip_family": "ipv4",
            "mode": "static",
            "system_name": "<FQDN or IP address for the appliance. Optional when the mode is Static. Remove this if using dhcp.>",
            "ip": "<Static IP address. Remove this if using dhcp.>",
            "prefix": "<Network prefix length. Use only when the mode is 'static'. Remove if the mode is 'dhcp'. This is the number of bits set in the subnet mask; for instance, if the subnet mask is 255.255.255.0, there are 24 bits in the binary version of the subnet mask, so the prefix length is 24. If used, the values must be in the inclusive range of 0 to 32 for IPv4 and 0 to 128 for IPv6.>",
            "gateway": "<Gateway IP address. Remove this if using dhcp.>",
            "dns_servers": [
                "<DNS Server IP Address. Optional when the mode is Static. Remove this if using dhcp.>"
            ]
        },
        "os": {
            "password": "<Appliance root password; refer to --template-help for password policy. If left blank, or omitted, you will be prompted to enter it at the command console during template verification.>",
            "ntp_servers": "time.nist.gov",
            "ssh_enable": false
        },
        "sso": {
            "password": "<vCenter Single Sign-On administrator password; refer to --template-help for password policy. If left blank, or omitted, you will be prompted to enter it at the command console during template verification.>",
            "domain_name": "vsphere.local"
        }
    },
    "ceip": {
        "description": {
            "__comments": [
                "++++VMware Customer Experience Improvement Program (CEIP)++++",
                "VMware's Customer Experience Improvement Program (CEIP) ",
                "provides VMware with information that enables VMware to ",
                "improve its products and services, to fix problems, ",
                "and to advise you on how best to deploy and use our ",
                "products. As part of CEIP, VMware collects technical ",
                "information about your organization's use of VMware ",
                "products and services on a regular basis in association ",
                "with your organization's VMware license key(s). This ",
                "information does not personally identify any individual. ",
                "",
                "Additional information regarding the data collected ",
                "through CEIP and the purposes for which it is used by ",
                "VMware is set forth in the Trust & Assurance Center at ",
                "http://www.vmware.com/trustvmware/ceip.html . If you ",
                "prefer not to participate in VMware's CEIP for this ",
                "product, you should disable CEIP by setting ",
                "'ceip_enabled': false. You may join or leave VMware's ",
                "CEIP for this product at any time. Please confirm your ",
                "acknowledgement by passing in the parameter ",
                "--acknowledge-ceip in the command line.",
                "++++++++++++++++++++++++++++++++++++++++++++++++++++++++++++++"
            ]
        },
        "settings": {
            "ceip_enabled": true
        }
    }
}
Ở mục này các bạn khai báo giá trị muốn FQDN, username/passwd, datastore muốn deploy lên. Lưu ý phần "datacenter" & "target", đây sẽ là Cluster, host ESXI mà bạn muốn deploy lên.

Ví dụ hệ thống vCenter bên mình sẽ gồm

và mình muốn deploy lên host esx08.securityzone.local thì mình sẽ khai báo như sau.

Đây là file template của mình các bạn có thể tham khảo
JSON:
{
    "__version": "2.13.0",
    "__comments": "Sample template to deploy a vCenter Server Appliance with an embedded Platform Services Controller on a vCenter Server instance.",
    "new_vcsa": {
        "vc": {
            "__comments": [
                "'datacenter' must end with a datacenter name, and only with a datacenter name. ",
                "'target' must end with an ESXi hostname, a cluster name, or a resource pool name. ",
                "The item 'Resources' must precede the resource pool name. ",
                "All names are case-sensitive. ",
                "For details and examples, refer to template help, i.e. vcsa-deploy {install|upgrade|migrate} --template-help"
            ],
            "hostname": "<FQDN or IP vcenter>",
            "username": "administrator@vsphere.local",
            "password": "YourPasswd",
            "deployment_network": "vDS_DB_20",
            "datacenter": [
                "Datacenter"
            ],
            "datastore": "vsanDatastore-Cluster02",
            "target": [
                "Cluster_Prod02",
                "esx08.securityzone.local"
            ]
        },
        "appliance": {
            "__comments": [
                "You must provide the 'deployment_option' key with a value, which will affect the vCenter Server Appliance's configuration parameters, such as the vCenter Server Appliance's number of vCPUs, the memory size, the storage size, and the maximum numbers of ESXi hosts and VMs which can be managed. For a list of acceptable values, run the supported deployment sizes help, i.e. vcsa-deploy --supported-deployment-sizes"
            ],
            "thin_disk_mode": true,
            "deployment_option": "small",
            "name": "Khoi_vCenter_Test_20.100"
        },
        "network": {
            "ip_family": "ipv4",
            "mode": "static",
            "system_name": "vctest.securityzone.vn",
            "ip": "10.123.20.100",
            "prefix": "24",
            "gateway": "10.123.20.250",
            "dns_servers": [
                "10.123.100.201"
            ]
        },
        "os": {
            "password": "YourPasswd",
            "ntp_servers": "10.123.100.201",
            "ssh_enable": true
        },
        "sso": {
            "password": "YourPasswd",
            "domain_name": "vsphere.local"
        }
    },
    "ceip": {
        "description": {
            "__comments": [
                "++++VMware Customer Experience Improvement Program (CEIP)++++",
                "VMware's Customer Experience Improvement Program (CEIP) ",
                "provides VMware with information that enables VMware to ",
                "improve its products and services, to fix problems, ",
                "and to advise you on how best to deploy and use our ",
                "products. As part of CEIP, VMware collects technical ",
                "information about your organization's use of VMware ",
                "products and services on a regular basis in association ",
                "with your organization's VMware license key(s). This ",
                "information does not personally identify any individual. ",
                "",
                "Additional information regarding the data collected ",
                "through CEIP and the purposes for which it is used by ",
                "VMware is set forth in the Trust & Assurance Center at ",
                "http://www.vmware.com/trustvmware/ceip.html . If you ",
                "prefer not to participate in VMware's CEIP for this ",
                "product, you should disable CEIP by setting ",
                "'ceip_enabled': false. You may join or leave VMware's ",
                "CEIP for this product at any time. Please confirm your ",
                "acknowledgement by passing in the parameter ",
                "--acknowledge-ceip in the command line.",
                "++++++++++++++++++++++++++++++++++++++++++++++++++++++++++++++"
            ]
        },
        "settings": {
            "ceip_enabled": false
        }
    }
}
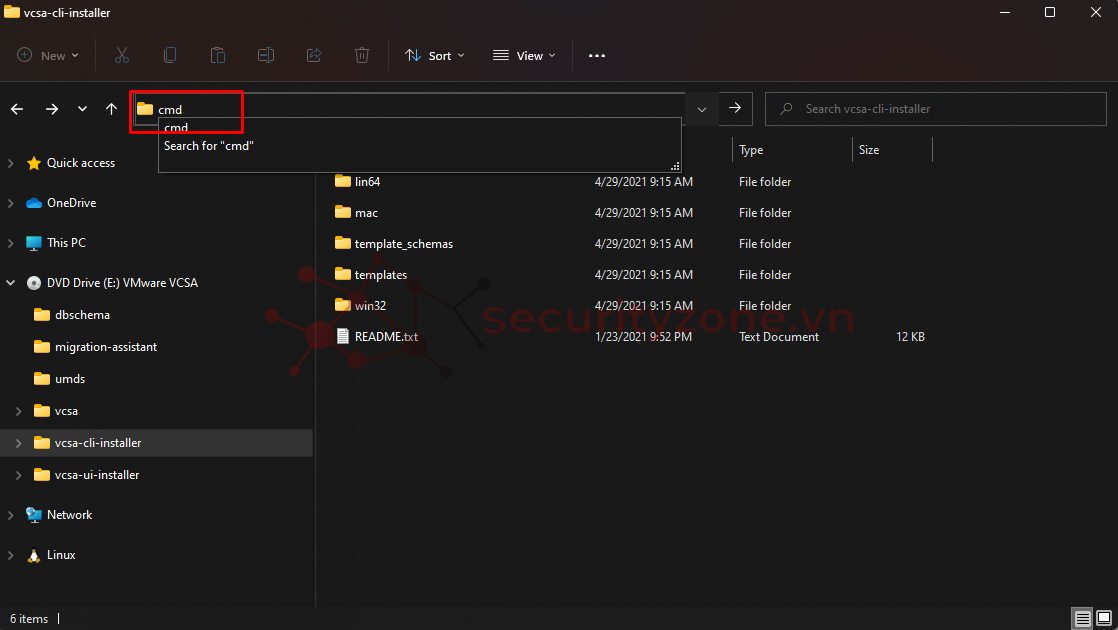
Để mở cmd nhanh vào thư mục win32 này. Các bạn nhập cmd vào như hình và nhấn enter.

Lập tức một cửa sổ cmd hiện lên với đường dẫn trong thư mục win32

Tiếp theo các bạn sử dụng lệnh ( Lưu ý: Nếu không có DNS Server để phân giải tên miền thì việc cài đặt sẽ thất bại)
Mã:
vcsa-deploy.exe install C:\Users\minhk\Desktop\embedded_vCSA_on_VC.json --accept-eula --no-ssl-certificate-verification- C:\Users\minhk\Desktop\embedded_vCSA_on_VC.json : đây là đường dẫn chưa file JSON của mình.
- --accept-eula : Accept the end-user license agreement. This argument is required to deploy the appliance.
- --no-ssl-certificate-verification: Skip security certificate verification for all server connections.
Ngoài ra trong file config của các bạn nếu mục này để true thì sẽ cần thêm tham số --acknowledge-ceip

Nếu không sẽ bị báo lỗi như hình:

Quá trình cài đặt sẽ diễn ra từ 15-30p tuỳ vào cấu hình server của các bạn. Stage 1 & Stage 2 các bạn không cần phải làm gì cả chỉ cần đợi 2 Stage này xong là có thể sử dụng vCenter

Sau khi chạy xong sẽ hiển thị như sau:

Như vậy là hoàn tất việc cài đặt vCenter bằng CLI. Cảm ơn các bạn đã đọc bài.
Đính kèm
Bài viết liên quan
Bài viết mới